The Manly Art of Shaving: Part 3

I’ve been going for sometime trying to switch back to the old ways of shaving using double edged blades because they were cheaper and shaving soap, also because it’s cheaper and I’ve finally come to a decision: I’ll have to do a modified form for our modern times.

The double edged blades worked, but I was getting nicks sometimes and they also took me a long time to shave and prep, so I’ll have to put the double edged blades aside. The shaving soap will stay because it’s actually a rather pleasant feeling to put on your face and there’s very little difference between the soap and canned shaving creme except cost.

Now I have the dilemma of what blade to use since while I’ve become used to the five blade Fusion blades I can’t stand paying close to $5/blade for a blade that lasts me almost a month. That was until I came across an ad on Facebook that I actually clicked on. Dorco USA that also makes the first double edged blade I tried also makes a pretty close duplicate of the Gilette Fusion blades only these have six blades and cost less than a dollar a blade.

I purchased the starter set of holder and two blades for $4.75 at their website. I really didn’t notice a difference between the Fusion and the Dorco. So now I can shave for about $12 per year instead of around $60/year and the best part is it’s faster with the multi blades.

I’ve also found I don’t have shave right after I get out of the shower in the morning so let me share my technique with you.

1. Take a washcloth and turn on the hot water and make the water as hot as you can stand. Drop your brush in the water and run some water over the soap.

2. Take the hot wet cloth and run it all over your face for about a minute. If water is dripping off your face you’ve done it right.

3. Grab the brush and start working it in circles in the soap until you’ve got a good foam up.

4. Cover your face in the foam which should also now be hot to warm. Badger brushes tend to hold more water than boar brushes so you’ll get your face wet and lubricated better.

5. I like to run the blade under some hot water as well to warm it up and then start shaving.

6. While people tell you not to do this, I always shave against the grain and start with my throat and move to the cheeks then do the chin and mustache area. I do it in this order because the chin and mustache area are always the hardest to shave and you want the water to soak in a lot.

7. Once you’re finished rub around your face to see if there’s any place that need a little more work. You should still have enough of the soap left over that you can do the clean up just fine.

8. Once you’re finished splash your face with witch hazel and then water.

9. Rub off any water left with your hands then apply a suitable aftershave moisturizer.

By doing this I only have to shave every other day and when I’m finished I’ve got baby’s butt smooth skin. Try it and see how it works and let me know.

My Manly Man Experience First Week

So on my first chance I tried the new double edged razor and shaving soap and found them to take a bit more time and needed some help at the end from the fusion razor to get a good close save so I decided to test in various combinations to see which would work out the best.

Next shave was with the 5 blade fusion and shaving soap. It was faster, but just as close a shave as with the double edged razor [probably because I finished up with the fusion]. I can see using these in a hurry, but I’m also used to shaving against the grain with the 5 blade fusion which probably was why it’s faster. In both cases no nicks or blood in either case which in my opinion is good.

Third time is the double edge with fusion gel and shaving against the grain. No problems here. Took a little less amount of time, but I still had to finish off with the fusion in a few places. I’ve been told while reading around that the Dorco blades that came with it are not very aggressive, well now I understand that means they are so sharp, but I did get almost as close with a double edged razor blade than I did with a five bladed razor that cost about $4.87 each as opposed to the double edged blade that I can get for around 8¢.

Four time is the double edge with Col. Conk shaving soap and against the grain. Still not as close a shave. I think I have to get some sharper blades since I once again had to finish off with the five blade fusion, but it was faster. I have a sample pack on order from West Coast Shaving and should have them by Monday. From what I’ve read the Dorco blades that came with the razor aren’t considered very sharp. In the mix of blade is a set of Feather blades which are supposedly not for the timid or untrained in double edged shaving. I think I’ll wait a bit until I’ve had enough practice to try those, but I think I’ll have this down in no time. So far not a single scrape, nick or cut. If anyone out there still uses double edged blades and has some blade recommendations I’d love to hear them.

The Manly Art of Shaving

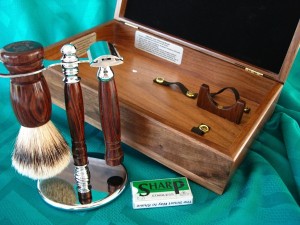
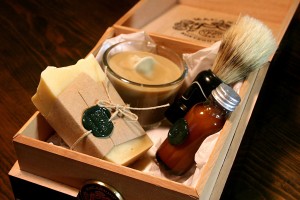
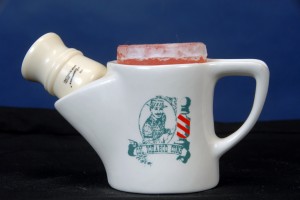
I have decided for a number of reasons to go back to old school shaving. Part is the cost of the modern day cartridges and foaming gels and the other is because there’s just something about pulling out that old mug of soap and lathering it up with a brush that I want to get back into. There are many upscale stores in San Francisco that will charge you a pretty penny to go old school, but it doesn’t have to be that expensive.

I moved up from double blades, to triple blades, quadruple blades and finally five bladed cartridges. These cost me close to $5 each. Now I only shave every other day so I can get a lot of life  out of a blade. I take good care of my blades and after I’m done shaving rinse them off in water then dip them in 90% isopropyl alcohol to completely dry them. I can get close to a month out of one of these blades. It starts to show at the end of the month when it makes it harder to get a close shave, but I never get any cuts.

I did for awhile use shaving soap and found out that a single bar lasted me about a year. I actually used the cheap Williams soap that I think including the mug cost me about $2.99. That’s a good price for a year’s worth of shaving cream. When you add hot water to the soap and then soak the brush in hot water for a few seconds and start building up the lather the first thing you’ll notice when it goes on your face is that it’s warm, not cold. This including the liquid helps soften your beard to make it easier to remove. I’ve even heard now of men who use a pre-shave oil on their face to help relax the beard stubble. Many of these are expensive, but you can use Cornhuskers lotion that you can get for about $3 and save your money.

I’ve never tried a double edged safety razor before, but Dad swore by them. I’ve found them online ranging in price between $15-$150 and while price does matter to some extent you don’t have to go top shelf at the start. You’ll have to find the blades as well which so far I’ve only seen online. I’ll start with five blades at first, but if it all goes well I’ll get 100 which will drop the price down to around 20¢ each. I’ve heard you can get about 5 shaves out of each side so with me shaving every other day that means it’ll cost me about $3.80/year for razor blades. Far less than for the cartridges. Merkur blades seem to be the standard of excellence people are recommending. There are many suggestions for how to use a safety razor and youtube has tons of videos. Some of them are quite good like the one posted at the bottom.

You’ll have to consider the brush as well. There are three types, boar, badger and synthetic. Boar is the most common, but comes in three grades the cheapest and worst usually what you find in stores. Synthetics have varying results, so I’ll suggest a badger brush since from what I’ve read they seem to be the most consistent and best overall quality. It’s also what I’ve had in the past after trying a boar brush. Badger brushes hold water better and you can find them in a few stores in San Francisco at a relatively cheap price. Oh, and by the way skip the after shave lotion and just use a squirt of witch hazel afterwards followed by a few splashes of water on your face followed by any decent after shave balm or moisturizer.

Overall, it looks like from my research that I can get into this for about $30 investment and that should hold me at least a year with only having to buy a bar of soap and some new blades for the next year. Which would add only another $5 each year. Sure the disposables and cartridges are convenient and I’ll probably take one along when I travel, but I think for the overall cost savings I’m going to give it a shot.

The Saddest Playground In San Francisco

I’ve seen lots of changes to the playgrounds in San Francisco and a lot of them have been really good. Being a parent and having to take your kid out to a place where they can run around and work off some energy so they don’t destroy your house is always a good thing, but there are some places that still need help. This one is on 24th Avenue and Quintara Street.

This playground, really a mini playground has looked like this for close to 50 years. They did put in some of that spongy stuff down and have replaced the benches, but it’s still the same. For some reason it even warranted a plaque. I’m not sure why because other than a few swings, small slide and sandbox there’s really nothing else left.

It’s also not fenced in and a quick run into the streets. It is also used as a staging point for Abraham Lincoln High School’s PE teachers before making the kids run around the reservoir so when PE is happening the teachers and students don’t really care much if you’re a parent with a child there to actually use the playground. We were lucky in that we only visited this playground when our daughter was very young and she was just learning to walk. Now that she knows how to walk and can run around by herself there are plenty of other places to go to that offer much more energy releasing activities as well a mentally stimulating forms of play.

While there have been great improvements to other Sunset neighborhood parks so as Frank McCopping playground and West Sunset playground, this one has pretty much been forgotten. My suggestion to our local Supervisor Carmen Chu is to either upgrade this mini-playground or just remove it and add in a few of those concrete chessboards and leave it as a meeting place for people who often use it already as a place to meet up and have a chat. It’s a small area so you wouldn’t need much there, but leaving it in it’s current state of looking like it was built during Russian industrial era times just isn’t San Franciscan. Email Supervisor Chu or tweet her about this and maybe we’ll see something get done.

NERT: It could save your life

NERT, or Neighborhood Emergency Response Team is a free service provided by the San Francisco Firefighters to help train the public in how to deal with emergency and disaster related situations. Other cities have Community Emergency Response Team classes, but San Francisco, being a bit different focuses on the type of disasters we are most likely to encounter. I haven’t heard of a hurricane ever hitting San Francisco, but earthquakes are up there at the top of the list and this is a good way to get training on what to do in case you’re hit by one or any of the other problems that could crop up with or without an earthquake such as fires, medical emergencies, etc.

My wife found out about this first and brought it up to me because I always used to test her by yelling GET DOWN NOW! and watch her ask me, why? I’d politely remind her that if she had to question me when I yelled a line like that she might end up dead. I can be a bit smug at times and I know that it wasn’t exactly the right situation to make that most effective. Since I had been a Boy Scout and gone through all of this before I figured it might be fun to have a refresher course since it was free as well. There are six classes you take totaling 20 hours. It’s not really that hard or time consuming and it’s definitely not a boring class. You have to be re-certified every couple of years, but that’s just having to take the last two courses.

Well, it turns out what I learned as a Boy Scout isn’t what you’re supposed to do anymore. We were always taught the first thing you do when someone has a severed limb [how many of us have ever been in that situation?] was to apply a tourniquet. Turns out that’s not the best thing to do since you could end up making the person lose more of the limb by killing off blood flow and you should always apply direct pressure until medical professionals can get there.

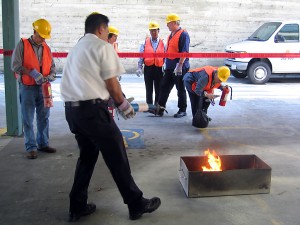
Remember standing in a doorway during an earthquake? WRONG! It’s actually best to get up against a way because if the ceiling drops in chances are pretty good that a portion will fall at an angle leaving you with a safe place. I also got to learn things I had never thought of before such as teamwork in a situation when some is trapped under say a fallen telephone pole or a car. This was also the first time someone had lit a controlled fire and handed me an extinguisher and told me to put it out. These are handy tips to know and the best part was at the end we got our yellow hard hats and orange safety vests. Yes, some of you might think at times that those outfits look a little dorky, but if something bad comes down like another ’89 earthquake you’ll be glad to see these people. I could go into more detail, but it’s best to get your information from the NERT website.